Flying with a Telescope: Practical Guide and 2026 Regulations
Do you dream of observing the southern sky from Chile, the northern lights in Iceland, or the pristine skies of the Canary Islands? Flying with a telescope is possible, but it takes some preparation. This complete guide explains everything you need to know.
Why bring your telescope on a plane?
The legendary observing destinations
Some observing sites are well worth the flight:
Southern Hemisphere:
- Atacama (Chile): The clearest sky in the world
- Namibia: Pristine southern sky
- Australia: Outback with no light pollution
- New Zealand: International dark sky reserves
High-altitude sites:
- Mauna Kea (Hawaii): 4,200m elevation
- Teide Peak (Canary Islands): Ideal latitude
- La Palma: Professional observatories
Specific phenomena:
- Northern lights: Norway, Iceland, Alaska
- Total eclipses: Ever-changing destinations
- Southern sky: Magellanic Clouds, Southern Cross
Bringing your own vs renting locally
Bringing your telescope: ✅ Familiar instrument (no adaptation needed) ✅ Controlled quality ✅ Guaranteed availability ✅ Your own accessories
Renting locally: ✅ No transport hassle ✅ Often a large aperture ❌ Limited availability ❌ Variable quality ❌ High cost
Airline regulations for telescopes (2026)
Allowed cabin dimensions
IATA standards (most airlines):
- 55 × 40 × 20 cm maximum
- Weight: 8-12kg depending on the airline
- Bag + cabin baggage: usually just 1 item
Low-cost airlines (Ryanair, EasyJet):
- Reduced dimensions: 40 × 20 × 25 cm
- Weight: 10kg max
- Often only one (small) bag allowed
Premium airlines (Air France, Lufthansa):
- More lenient
- 2 cabin bags possible
- Weight up to 12kg
What can you bring in the cabin?
Allowed ✅:
- Telescope tube (if dimensions are OK)
- Disassembled mount
- Eyepieces in a pouch
- Finder scope
- Non-pointed accessories
Forbidden ❌:
- Collimation laser (a laser device)
- Sharp/pointed tools
- Liquids >100ml (oil, cleaner)
- Lithium batteries >100Wh (some GoTo mounts)
Grey area ⚠️:
- Tripods (sometimes refused as a “potential weapon”)
- Cheshire eyepieces (small, usually fine)
Security screening: Anticipate the questions
What the scanner sees:
- A suspicious tube shape
- Optical components (thick glass)
- Screws and metal parts
Tips:
- Arrive early (30 extra minutes)
- Be ready to explain calmly
- Show a photo of the assembled telescope
- Carry a technical spec sheet in English
- Be patient and courteous
Our experience: 95% smooth passages with the Smallest, but always allow extra time.
Solutions for cabin-friendly telescopes
Telescopes specifically designed for air travel
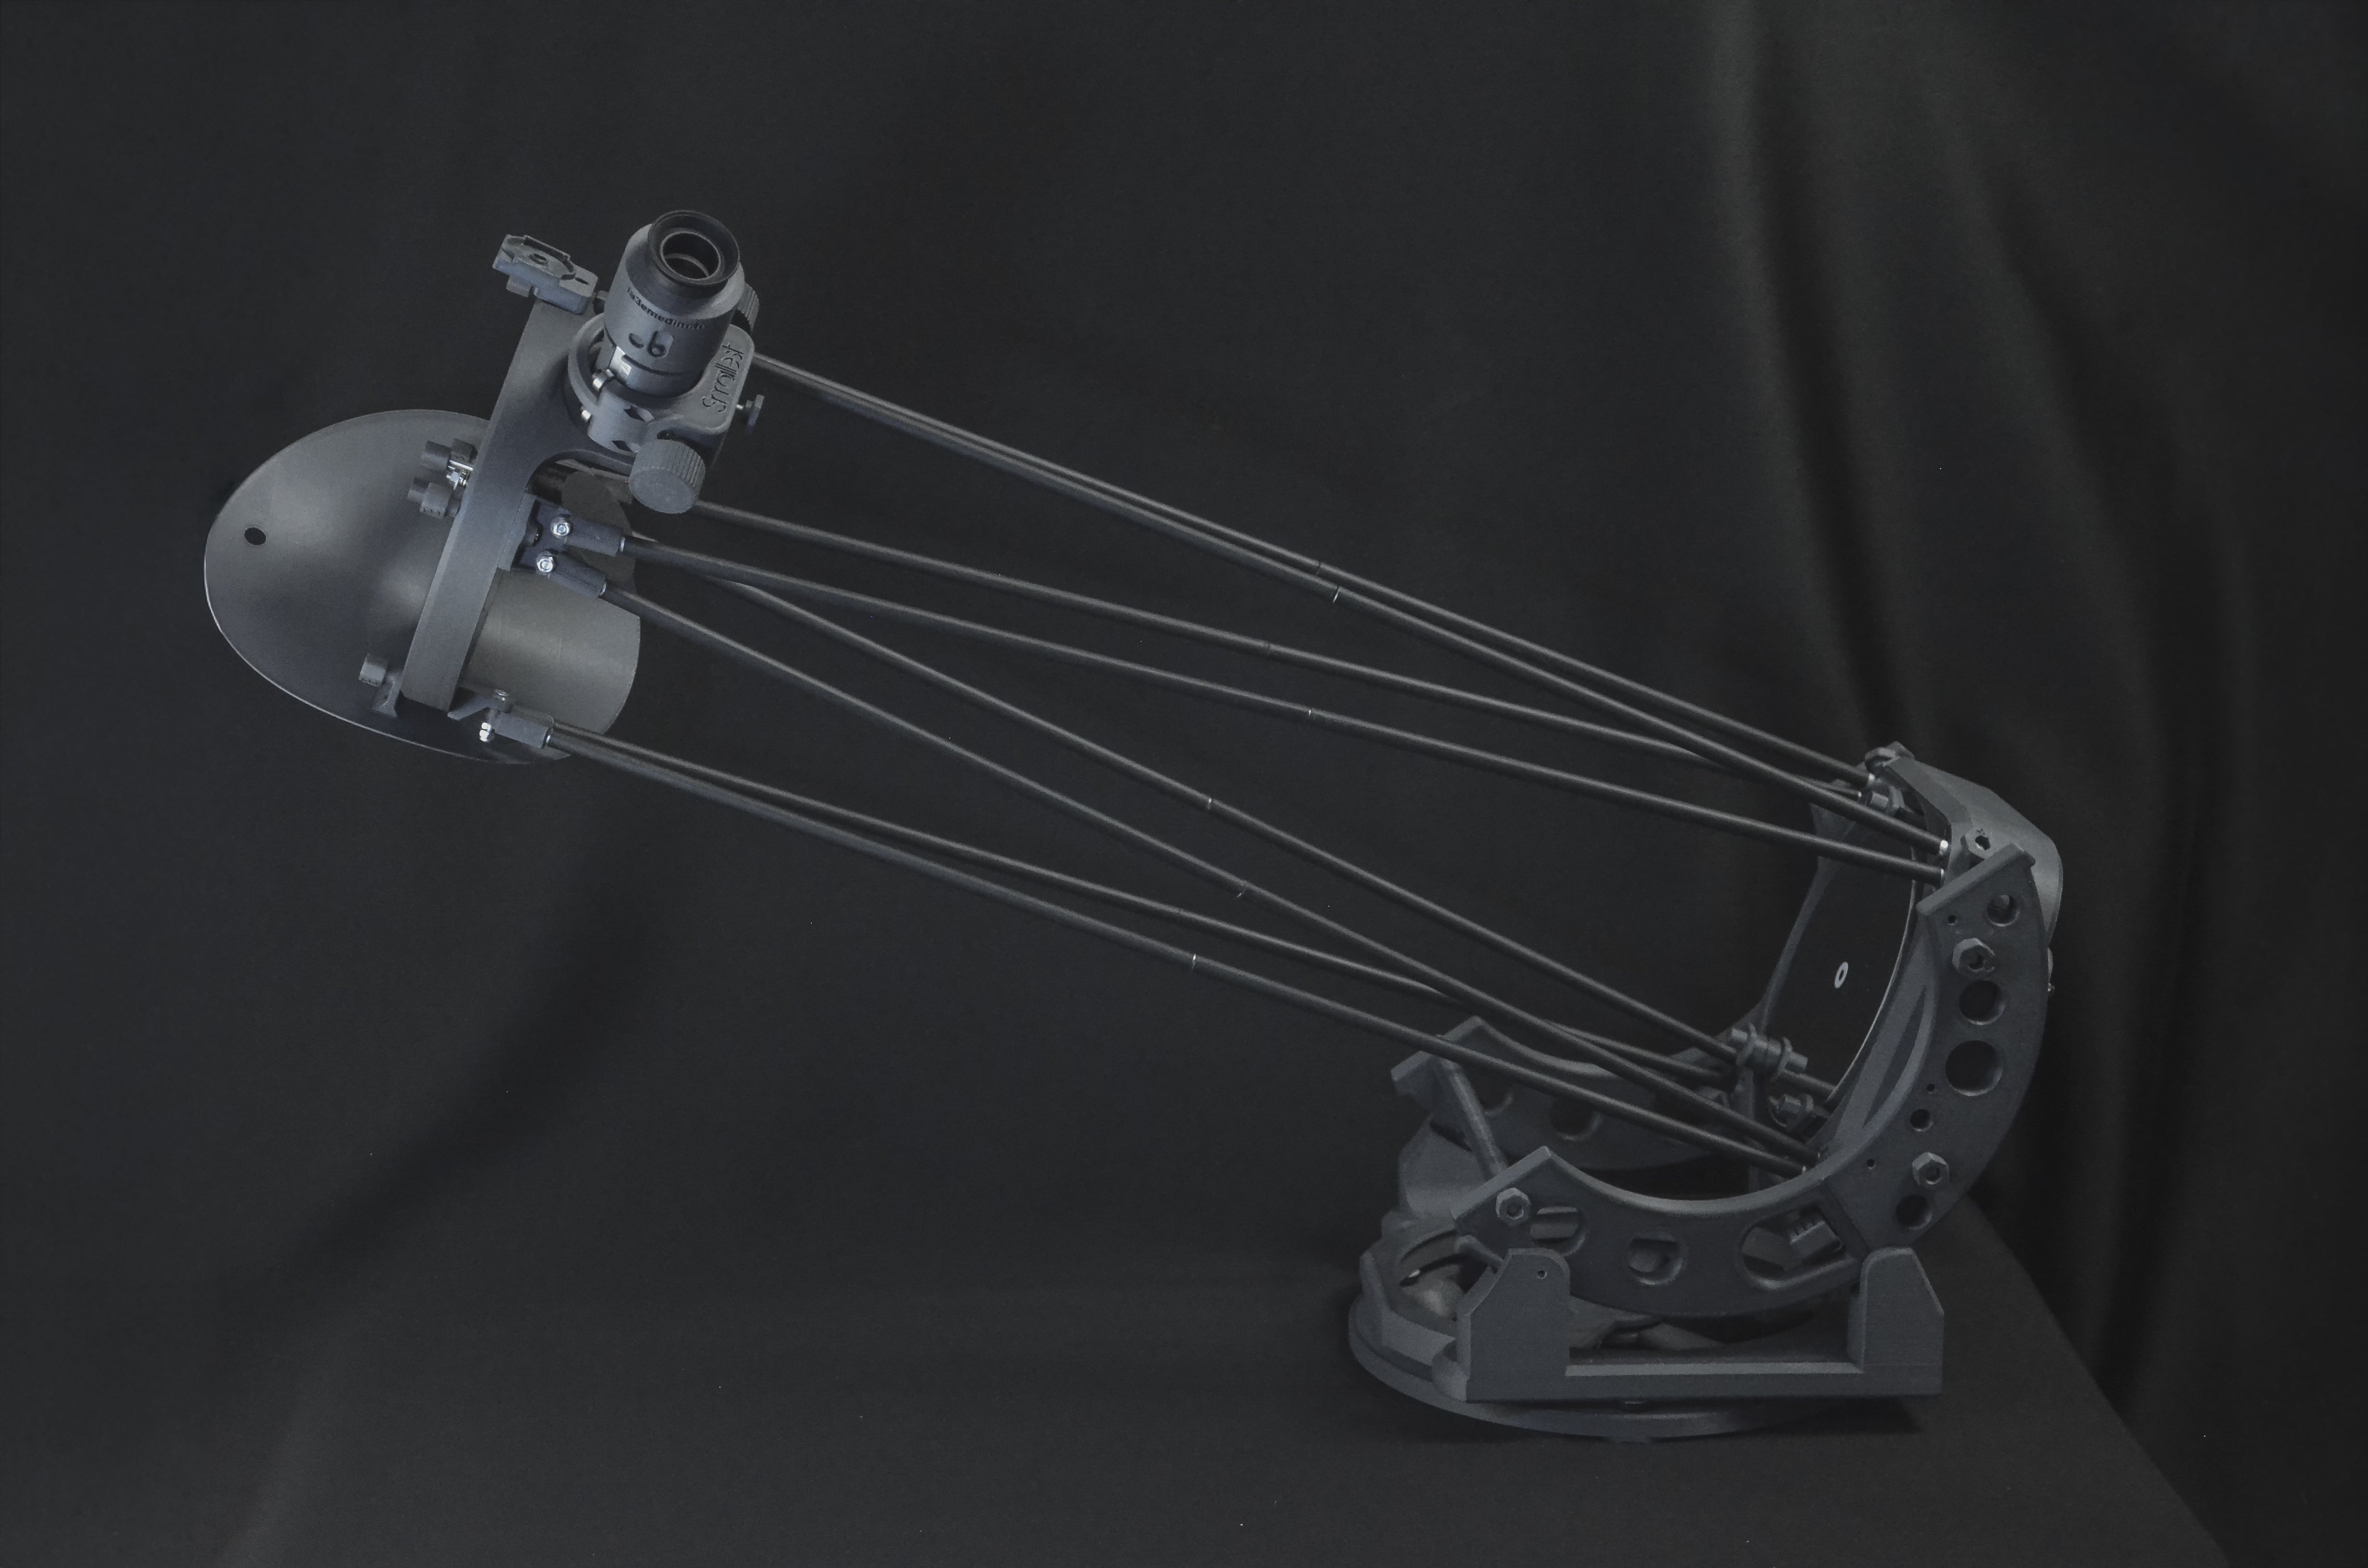
The Smallest: The first “airplane-compatible” telescope
The Smallest telescope was specifically designed for air travel:
Folded dimensions: 25 × 25 × 20 cm
- ✅ Fits every cabin size restriction
- ✅ Fits under the seat in front of you
- ✅ No problem in the overhead bin
Total weight: 4kg with optics
- ✅ Well under the limits
- ✅ Comfortable to carry all day
Disassembly:
- Primary and secondary mirrors separated
- Tube in 3 sections
- Dobson base folds flat
- No tools needed
Adapting existing telescopes
Short refractors
Advantages:
- Compact tube (60-80cm)
- Lightweight mount
- Relatively simple transport
Example: 80/400 refractor
- Tube: 45cm
- With an alt-az mount: fits in the cabin
Limitations:
- Modest performance at small apertures
- APO models are expensive
Short Newtonians (F/4 - F/5)
Possibilities:
- 114/450 Newtonian: very compact
- 130/650 Newtonian: tight but doable
- 150/750 Newtonian: needs disassembly (Smallest)
The classic problem:
- A 75cm tube doesn’t fit in a standard cabin bag
- Solution: remove optics + shorten the tube
What does NOT fit in the cabin
Schmidt-Cassegrain/Maksutov:
- Compact tube BUT heavy mount
- Bulky fork mount
- Sensitive electronics
- → Must go in the hold
Long Newtonians (F/8+):
- Tube >100cm
- → Hold or radical disassembly
Classic Dobsonian:
- Huge base
- → Car transport only
Checked baggage: Essential precautions
Protecting your telescope
Multi-layer packing:
-
Optics:
- Individual padded pouches
- Caps on all optical surfaces
- Wedge into rigid foam
-
Tube:
- Thick padding (5cm foam)
- Reinforced end protection
- Prevent internal movement
-
Mount:
- Remove fragile parts
- Protect axes and bearings
- Fasten securely
A suitable case:
- Hard shell (Pelican, B&W)
- TSA locks (mandatory for the US)
- Very visible “FRAGILE” label
- High baggage insurance
Declaring your equipment
Valuation:
- Declare the real value
- Extra insurance is often worthwhile
- Keep receipts and photos
“Fragile equipment”:
- Some airlines offer a special tag
- Priority for gentle handling
- Fee varies by airline (€10-50)
Risks in the hold
Temperature:
- Down to -50°C possible in flight
- Condensation on warming up
- → Wait for acclimation before opening
Impacts:
- Rough handling is common
- → Over-protect everything
Loss/theft:
- Rare but possible
- → Insurance is essential
- → GPS tracker in the case
Optimal strategies by destination
Short-haul flight in Europe (2-3h)
Recommendation: Cabin if possible
Ideal setup:
- 70-80mm refractor or Smallest
- Padded backpack
- Eyepieces in a chest pouch
- Lightweight photo tripod (hold if refused)
Cost: €0 (standard cabin bag)
Medium-haul flight (4-8h)
Recommendation: Cabin or hold with moderate protection
Setup:
- 130-150mm Newtonian, disassembled
- Optics in the cabin (personal bag)
- Structure in the hold (semi-rigid case)
Cost: €0-50 (depending on checked bag)
Long-haul flight (8h+)
Recommendation: Optimize your luggage
Strategy 1 (Smallest):
- Everything in the cabin
- 4kg total
- Zero risk
- Maximum comfort
Strategy 2 (standard telescope):
- Optics in the cabin (irreplaceable)
- Structure in the hold (replaceable)
- High insurance
- Maximum protection
Cost: €30-100 (hold + insurance)
Tips from experienced travelers
Optimizing weight
Every gram counts:
- Minimal eyepiece set (3 max)
- Ultra-light photo tripod
- Digital star charts (smartphone)
- Shared USB chargers
Our 3.5kg setup (full Smallest):
- 150/750 telescope: 4kg
- 3 eyepieces: 400g
- Cheshire: 50g
- Head torch: 100g
Useful documentation
Print and carry:
- Telescope spec sheet (in English)
- Photo of the assembled telescope
- Purchase receipt (proof of ownership)
- Customs declaration if outside the EU
PDF on your smartphone:
- All of the above documents
- Airline contact details
- Insurance policy numbers
Talking to staff
At security:
- “It’s a telescope for astronomy”
- Show a photo if needed
- Offer to open it calmly
- Never get upset
At check-in:
- Ask for a “Fragile” tag if checking it in
- Explain the value if needed
- Smile and be patient
After arrival: Getting set up
Acclimation
Crucial after transport:
- Wait 2-4h outside of the bag
- Let it reach ambient temperature
- Check for condensation
- Inspect visually
Essential checks
Checklist:
- ✓ Collimation (especially for Newtonians)
- ✓ Screws and bolts tight
- ✓ Optics clean
- ✓ Mount axes move freely
- ✓ Test on a bright star
Collimation:
- Almost always needed after a long-haul flight
- 5-10 minutes with a Cheshire
- Essential for optimal performance
First test
Target: the Moon:
- Easy to find
- Reveals misalignments
- Allows fine adjustments
Then a star:
- Focus test
- Check for pinpoint images
- Confirms performance
Alternatives to bringing your own gear
Renting locally
Tourist observatories:
- Large-aperture telescopes
- Guided sessions
- No transport needed
- €50-200/evening
Local clubs:
- Often free or low-cost loans
- Meet local enthusiasts
- Requires contacting them in advance
“Turnkey” services
Organized astro trips:
- Equipment provided on site
- Expert guide
- Full logistics
- €1,500-5,000/week
Our partners: We work with several astronomy tour guides. Contact us for recommendations.
Summary: Your astro travel checklist
3 months before:
- Book flights (check baggage policy)
- Travel + equipment insurance
- Scout observing sites at your destination
1 month before:
- Test all your equipment
- Prepare protective packing
- Print documents
1 week before:
- Perfect collimation
- Clean the optics
- “As new” photos (for insurance)
On the day:
- Arrive at the airport 3h early (international)
- Documents accessible
- Smartphone fully charged
At your destination:
- Acclimation 3-4h
- Full check-up
- Quick test if time allows
Conclusion: Astronomy without borders
Flying with a telescope is no longer a pipe dream. With preparation and the right equipment, the whole world becomes your observing ground.
Modern solutions:
- Ultra-compact telescopes (Smallest)
- Lightweight materials (3D printing)
- Modular design
Your passport to:
- Unseen southern skies
- Rare phenomena (eclipses)
- Legendary destinations (Atacama, Mauna Kea)
The ultimate astronomy trip starts here ✈️🔭
➡️ Discover the Smallest, the airplane-compatible telescope ➡️ Our observing tips for travelers ➡️ Contact us for a custom project
Keywords: telescope on a plane, flying with a telescope, telescope transport, airplane cabin, astronomy travel, portable telescope, air travel regulations, telescope cabin baggage